
Rotis are one of the most common and loved foods in Indian households. A soft, fluffy roti pairs perfectly with vegetables, dal, paneer, or curry, making every meal more enjoyable. However, many people struggle to make rotis that stay soft for a long time. They often become hard, dry, or chewy due to small mistakes in the preparation process.
The secret to making soft and fluffy rotis is not complicated. It depends on choosing the right flour, kneading the dough properly, allowing it to rest, rolling it evenly, and cooking it at the correct temperature. With a little practice and the right techniques, anyone can prepare restaurant-quality rotis at home.
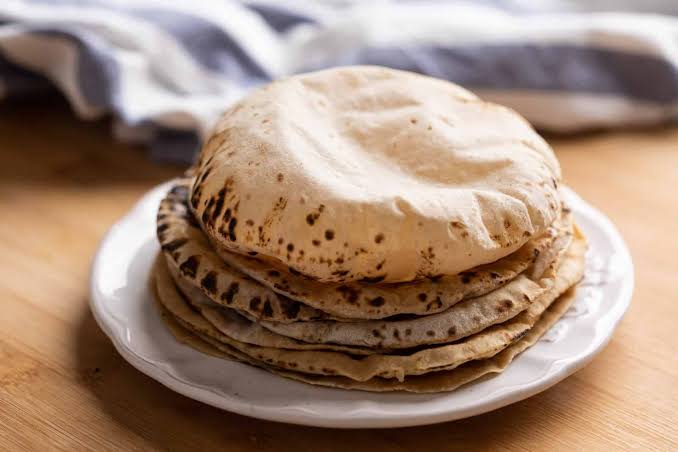
Ingredients
- 2 cups whole wheat flour (atta)
- ¾ cup warm water (adjust as needed)
- 1 teaspoon oil or ghee (optional)
- A pinch of salt (optional)
- Extra dry flour for rolling
Step 1: Choose Good Quality Flour
The quality of wheat flour has a big impact on the texture of rotis. Fresh whole wheat atta with fine milling gives better results than coarse flour. Store flour in an airtight container to maintain freshness and prevent moisture absorption.
Step 2: Knead the Dough Properly
Add the flour to a large mixing bowl. If using salt, mix it with the flour first. Gradually pour warm water while mixing with your fingers. Avoid adding all the water at once.
Once the dough starts coming together, knead it for about 8–10 minutes. Stretch and fold the dough repeatedly until it becomes smooth, soft, and slightly elastic. If the dough feels sticky, sprinkle a little flour. If it feels dry, add a few drops of water.
Adding one teaspoon of oil or ghee at the end of kneading helps create a softer texture, although it is optional.
Step 3: Let the Dough Rest
Resting the dough is one of the most important steps that many people skip.
Cover the dough with a damp cloth or lid and let it rest for 20–30 minutes. During this time, the flour absorbs moisture completely, making the dough softer and easier to roll. Rested dough also produces rotis that puff better during cooking.
Step 4: Divide into Equal Portions
After resting, knead the dough lightly once again. Divide it into equal-sized balls, approximately the size of a small lemon.
Roll each ball gently between your palms to create a smooth surface without cracks.
Step 5: Roll Evenly
Lightly dust the dough ball with dry flour. Roll it into a circle about 6–7 inches wide.
Apply gentle and even pressure while rolling. Avoid pressing too hard or rolling unevenly, as this prevents the roti from puffing properly.
Try to keep the thickness uniform across the entire roti.
Step 6: Heat the Tawa Properly
Preheat a flat tawa over medium-high heat. The tawa should be hot before placing the roti on it.
If the tawa is too cold, the roti becomes dry. If it is extremely hot, the roti burns before cooking properly inside.
Step 7: Cook the Roti
Place the rolled roti on the hot tawa.
Cook for about 20–30 seconds until small bubbles begin to appear. Flip it over and cook the second side for another 30–40 seconds.
Flip it once more. At this stage, gently press the edges with a clean cloth or spatula to help the roti puff. Alternatively, you can place the roti directly over a gas flame for a few seconds until it inflates completely.
A fully puffed roti usually turns out soft because the steam cooks the inside evenly.
Step 8: Apply Ghee (Optional)
After removing the roti from the heat, brush it lightly with ghee or butter if desired. This adds flavor and helps retain moisture.
Stack the rotis in an insulated casserole or wrap them in a clean kitchen towel to keep them warm and soft.
Tips for Soft and Fluffy Rotis
- Use warm water instead of cold water for kneading.
- Knead the dough thoroughly until smooth.
- Never skip the resting time.
- Roll each roti evenly.
- Cook on a properly heated tawa.
- Avoid overcooking, which makes rotis dry.
- Store cooked rotis covered to prevent moisture loss.
- Use fresh flour for the best results.
Common Mistakes to Avoid
1. Adding Too Much Flour
Using excessive dry flour while rolling can make rotis dry and tough.
2. Hard Dough
A stiff dough results in chewy rotis. The dough should feel soft but not sticky.
3. Uneven Rolling
Rotis with uneven thickness do not puff evenly.
4. Low Heat
Cooking on low heat dries out the roti before it cooks completely.
5. Overcooking
Leaving rotis on the tawa for too long removes moisture and makes them hard.
Benefits of Homemade Rotis
Homemade rotis are healthier than many processed bread options. Whole wheat flour provides dietary fiber, complex carbohydrates, vitamins, and minerals that support digestion and provide steady energy. Since homemade rotis contain minimal oil and no preservatives, they are suitable for daily meals and can be customized according to dietary preferences.
Conclusion
Making soft and fluffy rotis is a skill that improves with practice. By using fresh whole wheat flour, kneading the dough well, allowing it to rest, rolling evenly, and cooking on the right heat, you can consistently prepare delicious rotis that remain soft for hours. These simple techniques transform everyday meals and ensure your homemade rotis are light, tender, and enjoyable every time.
Frequently Asked Questions (FAQs)
Q: Why are my rotis not puffing?
A: This usually happens because the dough is too hard, the roti is rolled unevenly, or the tawa is not hot enough.
Q: Can I prepare the dough in advance?
A: Yes. Refrigerate the dough in an airtight container for up to 24 hours. Let it come to room temperature before rolling.
Q: Why do my rotis become hard after cooling?
A: Overcooking, insufficient resting of the dough, or leaving rotis uncovered after cooking can cause them to harden.
Q: Can I use milk instead of water?
A: Yes. Replacing part of the water with warm milk can make rotis even softer, though plain water works perfectly well.